Spring Cleaning – the Broadcast IT Edition
[May 2014] They are not all sitting inside nice racks. Lurking under desks and sales cubicle counters, hiding inside cabinets, or nearly forgotten behind control room furniture are the computers that run broadcast stations. With help from iolo’s Jack Follman we offer some good computer maintenance pointers.
We hope you have waved goodbye to snow and polar vortexes – Spring is finally here (in most places). This means more than saying hello to April showers and May flowers; it is time to do all that cleaning up that you have been putting off all winter.
But do not just concentrate on clearing out the papers and other debris that have accumulated on your desk, workbench, and all over the facility. Your computer could use some cleaning too.
In the spirit of the season, computer software maker iolo put together some spring cleaning tips for PC users and shared them with us. Perhaps some of these will help make your systems run cooler and better all summer long.
How Not to Clean Your Hardware
The fastest way to clean your computer is to open the sides and start blowing out the dust and debris.
Of course, this may actually cause the delicate electronic parts on the motherboard or your specialized cards to experience static shocks and possible shorts from the debris. Very quickly you indeed will have a very clean computer because you will be buying a new one to replace the blown unit.
A better alternative is to start your computer maintenance program by unplugging it. And even when everything is de-energized, please ensure you are well-grounded yourself so as to avoid causing any static arcs when you reach inside the computer case.
Fans and Vents
When it comes to the hardware portion of a routine PC cleanup, your best friend is a can of compressed air, which will allow you to blast every fan and vent on the outside of the tower.
But, tell the truth now: Has it been more than a little while since you last checked out each and every computer in the building?

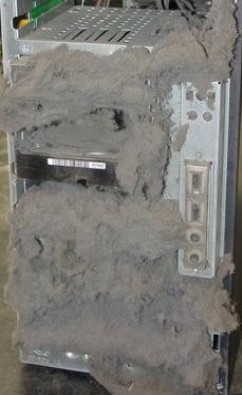
In that case, especially those units that sit under or behind desks often will be found with more than a few dust bunnies. If the unit has been “forgotten” for a couple of years, well, you probably should start with a vacuum cleaner with good suction and non-metal attachments.
After you get rid of all the heavy stuff on the box and filter, use a small brush to ensure the fan blades are clean.
Now it is time to detail the inside of the box.
Tackling the Interior
Before reaching inside the case, touch something metal for several seconds to ground yourself and drain any static electricity that could be damaging to the sensitive inside components of your system.
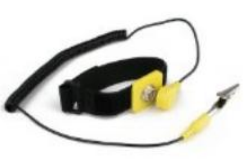
Even better, use an antistatic wrist strap that will maintain a ground connection as you work. Otherwise, you may find static building up as you move around, even more so in drier climates.
 Next, remove any added video or audio cards and place them aside. Other components, like audio connectors and port extensions, can be taken out too. You might wish to take a moment for a quick picture or three to help put them back where you found them. While they sit outside the computer case, it makes sense to put the components in anti-static bags, or take other precautions.
As you clean, be careful when using a vacuum – it is effective for much of the heavy built-up dust and debris, but do not get the hose attachment near any PC components, lest you hit one of them, causing a short to something else. Do get out your brush and the compressed air you used for the exterior and – very gently – get to work on cleaning the motherboard and slots. The same brush can be carefully used to clean all the components you set aside.
By the way, never ever spray liquid cleaners directly into your computer system, even if it is turned off. If you use any liquid product to get rid of dust, first pour it lightly onto a cloth.
Also, do not forget the keyboard; it very likely needs some cleaning too.
Putting It All Back Together
Before you seal the machine back up, check to make sure you put everything back in its rightful slot, all wires are in the correct position, and that you did not leave any cleaning materials inside the case.
As a precaution, once you close it all up, it is a good idea to wait at least half an hour before plugging in your now-clean PC and booting it up again. That way any cleaning fluid you used will certainly have dried.
While you are waiting you can clean the monitor screen with an appropriate fluid and dress the wiring properly.
Now, boot up and check to make sure the computer starts normally. A quick check (aka “the quick brown fox,” etc) with the keyboard will tell if all the keys are working normally or if the keyboard needs replacing.
Update the OS and Applications
Once the computer is back up and running, set aside some time to tackle the updating of the operating system and the various software applications in use.
 Regularly installing the software updates and help you ensure you have all the patches that were missing in older versions. The result often will help to speed up your system as well as making sure the computer is protected against many of the latest security threats. Another useful tool is to run one of the diagnostic suites that will analyze your system and identify ways to fix issues in the registry or elsewhere.
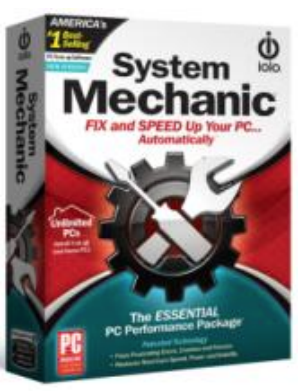
One popular suite is iolo’s System Mechanic (and System Mechanic Pro, with extra features) from (www.iolo.com). Now at Version 12.7, you can buy one copy with their Whole House License and use it on all your computers.
A review of version 9.5 of System Mechanic by Dave Dunsmoor is located here. As this time, he is working on an update.
Clearing Out the Crud
As you go through the diagnostics, also take the time to go through your applications folders.
Chances are you will find some programs listed that you have barely ever used – or even noticed – before. Some of them may have come preinstalled and others may have installed themselves without your knowledge.
Regardless, if you do not need them, you can delete them. Use the uninstall feature, if available, or the Add or Remove Programs screen in the Control Panel.
Hard Drive Issues
You probably have read and heard many time that it is important to back up your hard drive.
And, like many, you probably intend to do it someday, right? – preferably before your hard drive suddenly dies.
This is the right time. Back up your files onto an external hard drive or cloud storage service. Not only will you have a copy of everything, but you now can confidently go through your library and delete some of the stuff you do not use very often anymore. Need it again? That is what the backup is for.
Finally, one last maintenance item and we are done. Run a defragmenter to remove fragmented data and other clutter from your hard drive. By bringing files together, system speed can be increased significantly.
As with many of the items discussed, you really should defrag more regularly than once a year. The exception is with solid-state hard drives and flash drives. For a number of reasons, these should not be defragmented.
Now that your computer has had its Spring Cleaning, it should serve you well throughout the year, with just minor checkups every so often. May your computing be happy and problem-free.
– – –
Our thanks to iolo and Jack Follman for his input and assistance. Jack works at iolo and is a manager in their Public Relations department. You can contact Jack at jack.follman@iolo.com
– – –
Would you like to know when other articles like this are published?
It takes only 30 seconds to add your name to our secure one-time-a-week Newsletter list.
Your address is never given out to anyone else.
– – –
